How to enable Gmail’s ‘Send mail as’
Ah, the price of progress. Sparkly new features appear and sometimes really useful ones disappear.
One of Gmail’s lovely features is the ability to handle several email accounts, fetching email and making it easy to send email on behalf of that account by changing the From address.
<tl;dr> Send mail as is turned off by default in Gmail, here’s how to turn it back on </tl;dr>
Enabling this used to be a doddle, well fairly easy. Heading to settings, you’d pop in the email address, a link would get sent to this address. Click on the link and voila! You could send email and change the From address to the other account.
When you had a bunch of email addresses but prefer to have everything pour into one account, but be able to reply to email with the correct address, it was fabulous. Unfortunately, Google have turned this option off in the new version of Gmail. 🙁
“Function not enabled…external SMTP not allowed…contact your administrator”
Fortunately – after an hour on chat with the lovely Zornitsa D of Google’s support team – there’s a way of turning it back on. Phew!
Enable ‘Send mail as’ in Gmail
There’s a setting to turn this back on, but it’s buried. Deeeeep down in the admin console. Here goes…
Step 1 – Login to the admin console
If you’re logged in to Gmail, click on the Settings wheel in the top right-hand corner of the screen. If you are a domain administrator, you’ll see the option ‘Manage this domain’ similar to the image below. If you’re not a domain administrator, you’re out of luck, sorry.

Step 2 – Navigate to the advanced Gmail settings
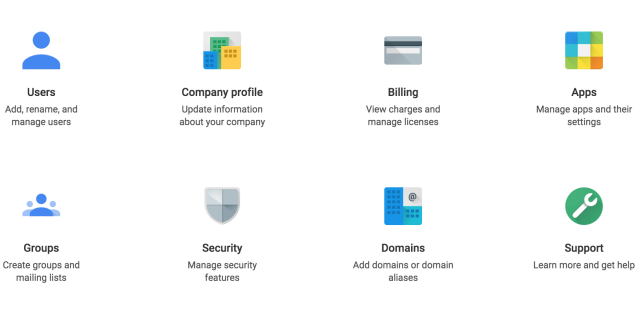
Brace yourself…and follow the pics below. Your experience might vary depending on your setup, but the icons and labels for the options should be the same. Click on the Apps icon.

Next, select the Google Apps option.
 Next, select Gmail
 Next, scroll waaaay down the bottom of the list of settings and select Advanced settings

And finally, find the option for Allow pre-user outbound gateways. Turn this on.

Now…if you head back to your Gmail settings, select Accounts and find the Send mail as option, you’ll be able enter the new email address. You’ll need to have the SMTP server settings for this email address, but it should be easy enough to find these from your email provider.
For example if you were using another Gmail account they’d be:
- SMTP Server: smtp.gmail.com
- Username: your full email address
- Password: an app-specific password (here’s how to create one)
- Select: Secured connection using TLS (recommended)
Click Add account and Gmail will send a verification email to the address that you’re trying to add. Click on the link in the email and hey presto! You’ll be able to send email From the account again.
So, it might be a pain in the neck, but I totally get why Google have done this. Allowing users to route through external email addresses is potentially a recipe for helping out spammers, although it’s an easy one to detect and shut down.
Hopefully the steps above will save some others the pain of trying to hunt down the option. If you spot any errors or find other ways of doing this, please leave a comment.
Caveat: this was tested on the paid-for Google for Work Apps account. I don’t know if it’ll work on the older legacy versions that are still free. Have you tried it? Leave a note in the comments if it works.
About Sam Michel
Inquisitive. Hopeful. Jovial. Cantankerous. Digital marketer. Event organiser. Long-time fan of tech, collaboration and innovation. Exploring digital, social, business, technology, society, psychology & startups. Founder Chinwag, Digital Mission, Pitch NYC, ChinwagPsych. Former Exec Dir, Social Media Week London. More short stuff @toodlepip on Twitter.


